Your Steel Building Specialist
How to Build a Barndominium From Start to Finish
How to Build a Barndominium From Start to Finish
So you're ready to build a barndominium? It's an awesome journey that takes a simple steel building kit and turns it into a fully customized home—a perfect blend of rustic style and modern, open-concept living.
Your Barndominium Journey From Dream to Reality
Kicking off a barndominium build is a big undertaking, but it’s incredibly rewarding. You're combining the raw durability of steel with the comfort and personality of a custom-built home. This guide is your real-world roadmap, designed to walk you through the entire process, from a vacant plot of land to a move-in-ready home.
We're not going to get bogged down in theory. Instead, we'll focus on the practical, tangible steps that actually matter: planning, financing, construction, and all the finishing touches. This is your project checklist to help you navigate each stage with confidence.
The infographic below breaks down the three major phases you can expect.
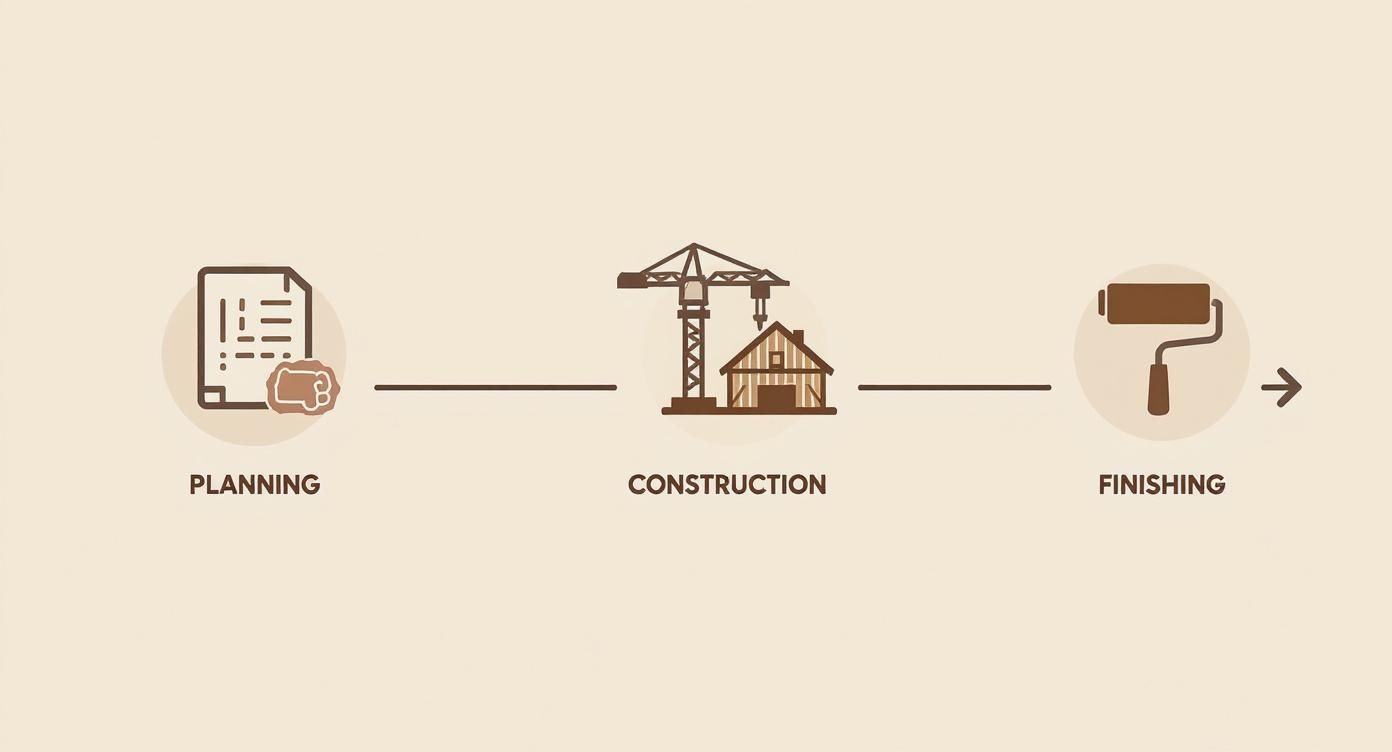
As you can see, getting the steel shell up is just one piece of the puzzle. The planning and finishing stages often require just as much time, effort, and attention to detail.
Understanding the Key Phases
The entire build can be broken down into a few manageable stages, each with its own timeline and budget. Knowing how these pieces fit together from day one is the key to a smooth project.
-
Planning & Prep: This is all the critical work you do before ever breaking ground. We're talking about securing your land, finalizing floor plans, getting your construction loan approved, and navigating the local permitting process. This foundational work can easily take 2-4 months and really sets the tone for everything that follows.
-
Constructing the Shell: Here’s where things get exciting and you see your structure finally take shape. This phase covers pouring the concrete foundation, erecting the steel frame, and installing the roof and wall panels. For a standard-sized kit, this can take another 1-3 months, depending on your crew and the weather.
-
Interior Finishing: The final stage is what transforms that steel shell into a real home. It includes everything from insulation and interior wall framing to running all the plumbing, electrical, and HVAC. Then comes drywall, paint, flooring, cabinets, and all the cosmetic touches that make it yours. This is almost always the longest phase, taking anywhere from 3-6+ months.
A common mistake is underestimating how long the finishing work takes. The steel shell goes up fast—sometimes in just a few weeks—but all that detailed interior work demands patience and a significant chunk of your budget.
Barndominium Construction Phases At a Glance
To give you a clearer picture, here’s a quick breakdown of how the timeline and budget typically get allocated across the major phases of construction.
Construction Phase
Typical Timeline
Estimated % of Total Budget
Site Prep & Foundation
2-4 Weeks
10-15%
Steel Kit Erection
1-3 Weeks
15-20%
Exterior Finishing
2-4 Weeks
5-10%
Interior Framing
1-2 Weeks
5-7%
MEP Rough-In
2-4 Weeks
10-15%
Insulation & Drywall
2-3 Weeks
7-10%
Interior Finishes & Fixtures
4-8+ Weeks
25-35%
Final Landscaping & Punch List
1-2 Weeks
3-5%
Keep in mind, these are just estimates. A complex custom interior or extensive site work can easily shift these numbers, but this table gives you a solid starting point for planning your project.
Navigating Plans, Permits, and Financing
Before a single shovel hits the dirt, the real work of building a barndominium starts at a desk. This is the unglamorous but absolutely critical phase where you line up your land, your money, and all the official permissions needed to turn a steel building kit into a home.
Get these details right from the very beginning, and you'll save yourself from some massive, costly headaches down the road.
Securing the Right Piece of Land
Finding that perfect spot is about more than just a pretty view. That gorgeous rural plot might look like a dream, but without the right infrastructure, it can quickly turn into a logistical and financial nightmare. You have to do your homework.
Here’s a practical checklist of what to investigate before you even think about making an offer:
-
Zoning and Covenants: Your first call should be to the local county planning office. You need to confirm the land is zoned for residential use. Just as important, ask if there are any restrictive covenants that could dictate the size, style, or even placement of your barndo.
-
Utility Access: How are you getting power, water, and internet? Figure out how close the nearest power lines are and what it will cost to connect. For water, determine if you can tap into a municipal supply or if you'll need to drill a well—a process that can run anywhere from $5,000 to $15,000, sometimes more.
-
Soil and Perk Tests: This is non-negotiable. A geotechnical soil test ensures the ground can actually support your foundation. If you’re not on city sewer, a percolation (perk) test is just as vital. It determines if the soil can absorb wastewater from a septic system. A failed perk test can make a property completely unbuildable.
Finding a Lender for Your Barndominium
Once you've got your land sorted, the next hurdle is financing. Getting a loan for a barndominium isn't always as simple as a mortgage for a traditional stick-built house. Many lenders just aren't familiar with steel-frame construction and can be hesitant to approve a loan.
The good news is that as barndos have exploded in popularity, lenders are getting smarter about their value and durability. Your job is to find the right financial partner and show up with a professional, buttoned-up proposal.
You'll most likely need a construction loan, which covers the building costs and then converts into a regular mortgage once you're done. To get that loan, lenders will want to see a comprehensive plan, including:
-
Stamped engineering plans for the steel building.
-
A detailed, line-item budget covering everything from the foundation to the doorknobs.
-
A realistic construction timeline.
-
Proof you’re working with a reputable builder or, if you're going the DIY route, that you have the experience to pull it off.
Pro Tip: Start your search with local credit unions and farm credit lenders. They tend to have more experience with non-traditional rural properties and are often more flexible than the big national banks. A complete building plan and a solid budget are your best tools for getting that "yes."
Choosing a Floor Plan That Works
Here’s where the fun really begins. The beauty of a steel barndominium is the clear-span interior. With no need for interior load-bearing walls, you have total freedom to design a layout that works for you. Think massive open-concept living areas, a huge integrated workshop, or a floor plan perfectly designed for your family's lifestyle.
You really have two main paths for finding a floor plan:
-
Stock Plans: You can buy pre-designed barndominium floor plans from various online sources. This is usually the fastest and most affordable option, but you'll likely need an architect or engineer to review and modify them to meet your specific local building codes.
-
Custom Design: Hiring a draftsman or architect gives you the power to create a home that is 100% tailored to your vision. It offers maximum flexibility but comes with a higher price tag and a longer timeline.
No matter which way you go, a well-designed floor plan is the foundation of a successful build. To help you get your ideas flowing, our comprehensive steel building buyer's guide offers key insights that can make the planning process much simpler.
The Permit Process Demystified
The last major piece of the pre-construction puzzle is getting your building permits. This involves submitting your complete set of plans to your local building authority for their stamp of approval. They'll comb through your designs to make sure everything complies with local and state building codes—structural, electrical, plumbing, and safety.
Don't even think about skipping this step. Building without a permit can lead to crippling fines, a forced demolition order, and the inability to ever insure or sell your property.
The rise of the barndominium is real. Market data shows that 7% of single-family builders constructed barndominiums in the year leading up to early 2024. Of those, a whopping 70% included a large shop area, which just goes to show how popular this versatile live-work design has become. It also highlights how critical it is to ensure your plans meet code for both the residential and workshop sections of your home.
Breaking Down Your Barndominium Budget and Kits
Let’s talk numbers. Getting a handle on the real cost of building a barndominium is the single most important step in making your project a success. It's way too easy to get excited about the low square-foot costs you see floating around online, but a smart, realistic budget accounts for every single detail—from the concrete under your feet to the light fixtures over your head.
Your total project cost is so much more than just the price tag on the steel building. You have to factor in land clearing, foundation work, septic installation, utility hookups, all the labor, and the entire interior finish-out. A clear-eyed view of these costs from day one is the best way to prevent nasty surprises that can completely derail your build down the road.
The Three Main Building Paths
When it comes to actually building your barndominium, you've basically got three options, each with its own set of financial and logistical trade-offs. The choice you make here will be the biggest driver of your overall budget and timeline. There’s no single "best" way—only the way that's right for your skills, bank account, and patience.
The barndo construction world is pretty diverse. For instance, building a custom home from scratch might involve material costs from $50,450 to $202,700, with labor adding another $59,000 to $158,000 on top of that. On the other hand, DIY kits offer a more wallet-friendly route with material costs from $40,000 to $150,000, though you’ll still need to pay for specialized work like concrete and plumbing.
To make the decision a little easier, let's compare these paths side-by-side.
Comparing Barndominium Building Approaches
This table breaks down the fundamental trade-off between cost, convenience, and customization. The more work you take on yourself, the more you can save, but it comes at the cost of your own time, stress, and effort.
| Approach | Typical Cost Range (Shell) | Pros | Cons |
|---|---|---|---|
| DIY Kit Assembly | $25 - $50 / sq. ft. | Maximum cost savings; you have complete control over the entire process. | Requires significant skill, tons of your time, and specialized equipment. |
| Kit with Hired Crew | $45 - $75 / sq. ft. | A good balance of cost and convenience; professional assembly ensures quality. | You're still the general contractor, which means managing multiple trades and schedules. |
| Custom "From Scratch" | $65 - $120+ / sq. ft. | Unlimited design freedom; you can source every single material locally if you want. | Highest cost; longest timeline; requires extensive project management skills. |
Choosing the right path is all about being honest with yourself about your skills, your budget, and how much of your life you're willing to dedicate to the project.
How to Choose a Quality Barndominium Kit
If you decide the kit route is for you, your next job is to find a reputable supplier. This is a big one. Not all kits are created equal, and the quality of the steel, the precision of the engineering, and the support you receive can make or break your entire project. A well-designed steel building kit is the backbone of your home, so this is not the place to cut corners.
When you're vetting potential suppliers, keep an eye out for these specific signs of quality:
-
Stamped Engineering Plans: This is completely non-negotiable. The plans must be reviewed and stamped by an engineer licensed in your state. You can't get a building permit without this, and it’s your proof that the structure is designed to handle local snow and wind loads.
-
American-Made Steel: Look for suppliers who use American-made steel. It consistently meets higher quality control standards for strength and reliability.
-
Primary Framing: A quality kit uses solid I-beam main frames, often called "red iron." You'll want to avoid lightweight tube steel or C-channel frames for the primary structure—they just don't offer the same long-term durability and strength needed for a residential building.
-
Complete Packages: A good supplier provides everything you need. That means all primary and secondary framing, sheeting, trim, and every last bolt and fastener required for assembly.
A huge red flag is any company that pressures you with "today only" pricing or is vague about what’s in their quote. A trustworthy partner will give you a detailed, itemized quote and plenty of time to review it thoroughly.
Budgeting Beyond the Steel Shell
Finally, always remember the kit is just the beginning of your expenses. A solid rule of thumb is that the steel shell and its erection will account for roughly 40-50% of your total project cost. The other half goes toward turning that shell into a home.
Create a detailed line-item budget that includes every expense you can possibly think of. Forgetting just one major category can put you thousands of dollars over budget in a heartbeat.
Key Budget Line Items:
-
Site Work: Land clearing, grading, and putting in a driveway.
-
Foundation: The concrete slab itself, including formwork, rebar, and labor.
-
Utilities: Septic system, well or water tap fees, and running electrical service to the site.
-
Labor: The cost to erect the shell (if you're not doing it) and for all interior trades (plumbers, electricians, etc.).
-
Interior Finishes: Insulation, framing, drywall, flooring, paint, cabinets, and countertops.
-
MEP Systems: All the plumbing, electrical wiring, and the complete HVAC system.
Building a barndominium is a fantastic way to get a custom, incredibly durable home. By carefully planning your budget and choosing the right building path and kit supplier, you can keep your project on track financially from start to finish.
Raising the Frame From Foundation to Shell
This is the moment it all gets real. Your barndominium stops being a set of plans on a table and starts climbing skyward. Once the groundwork is done, pouring the foundation and raising the steel frame is an incredibly rewarding process—you’ll be amazed at just how fast your home takes shape.
Everything moves from the ground up, beginning with a rock-solid foundation that will support your home for decades. From there, we’ll get into the specifics of erecting the steel, which is the heart and soul of learning how to build a barndominium.
Laying the Foundation for Success
For most pre-engineered steel buildings, a monolithic slab foundation is the way to go. It's efficient, strong, and the industry standard for a reason. This type of foundation gets poured all at once, creating a single, solid piece of concrete that acts as both the floor (the slab) and the footings (the thickened edges). This integrated design is perfect for distributing the weight from the steel columns.
Long before the concrete truck shows up, though, there's critical prep work. Your site has to be graded perfectly level and compacted for a stable base. Then, forms are built around the perimeter, and a vapor barrier is laid down to stop moisture from creeping up from the ground.
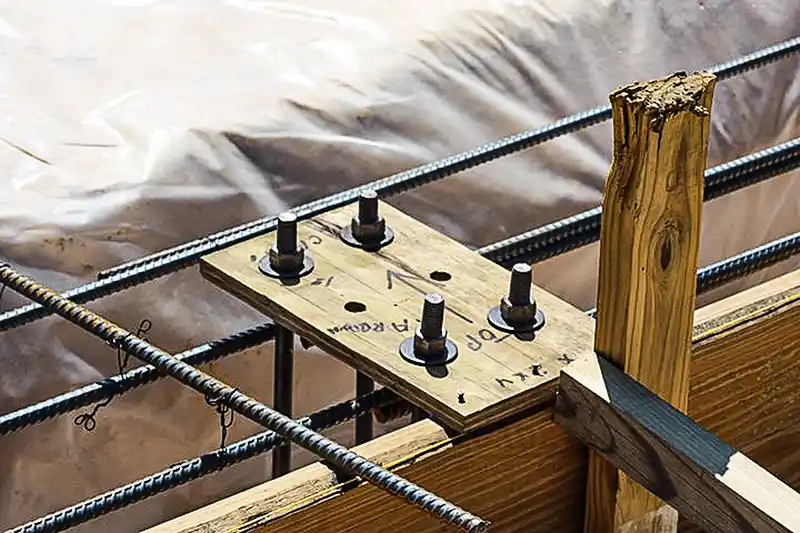
Inside those forms, a grid of rebar is tied together, giving the concrete incredible tensile strength. Now comes the nail-biting part: setting the anchor bolts according to your engineering plans. Their placement is absolutely critical—they have to line up perfectly with the base plates on your steel columns. Mess this up, and you’re in for a world of hurt when it’s time to raise the frame.
One of the most common—and costly—DIY mistakes is misplacing anchor bolts, even by a fraction of an inch. Always double- and triple-check your measurements against the building plans before the concrete starts to flow. A small error here can spiral into expensive, time-consuming fixes down the road.
If you want to get into the nitty-gritty, our guide on the ideal steel building foundation breaks down the different types and what your engineer will be looking for.
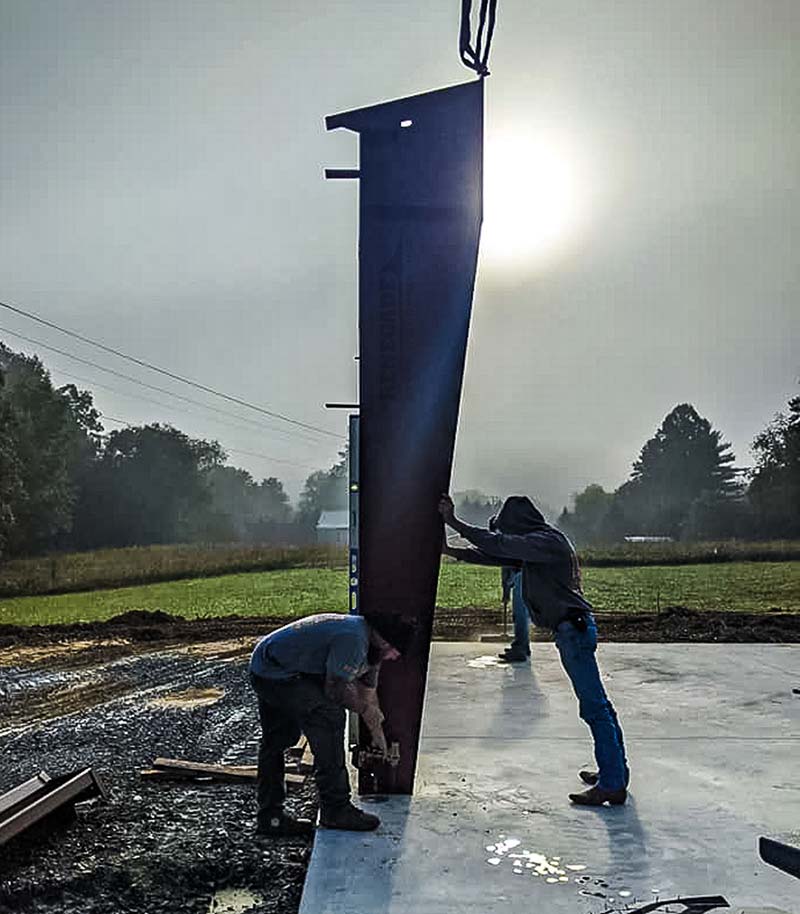
Assembling the Primary Steel Frame

With the foundation cured and ready, the most dramatic phase of the build begins: erecting the main steel frame. This is where the heavy lifting happens, literally. You'll need equipment like a telehandler or a crane to hoist the massive I-beam columns and trusses into place.
The process is straightforward and logical:
-
Main Columns: The vertical I-beam columns go up first. Each one is lifted onto its corresponding anchor bolts, then loosely bolted down.
-
Rafters and Trusses: Next up are the roof rafters or trusses. They’re usually assembled on the ground and then lifted into place to connect the tops of the columns. Bolting these pieces together creates the rigid "bay" that defines your building’s width and height.
Safety is non-negotiable here. The frame is wobbly and unstable until it's fully braced. Use temporary bracing to hold the first couple of bays perfectly plumb and square as you work. This keeps the entire structure aligned as you add more sections. A level and a plumb bob will be your best friends.
Installing Secondary Framing and Bracing
Once the main I-beam skeleton is standing, it’s time to install the secondary framing—what we call girts and purlins. These are smaller, C-shaped or Z-shaped steel pieces that run horizontally between the main frame components.
-
Girts are attached to the exterior of the wall columns.
-
Purlins are attached across the top of the roof rafters.
They do two key jobs: first, they add stability to the main frame, and second, they provide the attachment points for your wall and roof panels. This secondary grid is what truly ties the whole structure together, distributing forces like wind and snow across the entire building. At the same time, you’ll install the permanent bracing (cables or rods) specified in your plans, giving the structure its final rigidity.
Sheeting the Roof and Walls
With the full frame assembled, braced, and squared up, it’s time to close it in and create a weather-tight shell. This process is called "sheeting," and it involves attaching the large, 26-gauge steel panels to the girts and purlins. Depending on the insulation you have chosen for your building, fiberglass blanket insulation will be installed as the panels go on.
Typically you start with the walls. Wall panels are installed vertically, starting from a corner and working your way around the building. This is also when you’ll install the trim pieces that cover corners, eaves, and the base of the building. Trim gives your barndo a clean, finished look while sealing any remaining gaps.
Roof panels are laid in overlapping rows, sealed with butyl tape, and fastened with color-matched, self-drilling screws that have neoprene washers to create a watertight seal. It’s methodical work: lay a panel, check for square, fasten it down, and repeat.
Framing Openings for Windows and Doors
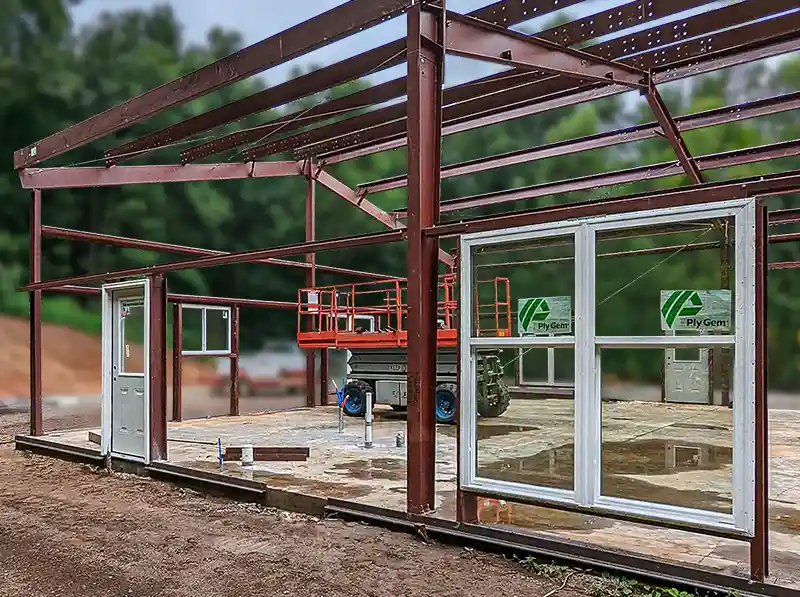
The final step in creating the shell is framing out the openings for your windows and doors. Your steel building kit will include C-channel steel members specifically for this.
These pieces are cut to size and bolted between the girts and main columns, creating a sturdy, framed box where each window or door will eventually go. It’s absolutely essential that these openings are perfectly square and level. If they aren’t, your windows and doors won't operate smoothly or seal properly against the elements.
Once these are framed, your barndominium shell is officially complete and ready for the real fun to begin: the interior work.
Finishing the Interior: From Shell to Home
With the steel shell standing tall and weathertight, your project shifts from heavy construction to the craftsmanship that turns a building into a home. This is the exciting part where your floor plan finally comes to life, room by room. It’s a layered process that demands careful planning, especially when you’re working inside a metal structure.
The first and arguably most critical decision you'll make inside is insulation. If you get this wrong in a steel building, you'll be fighting a losing battle against condensation and uncomfortable temperatures for years. This is where you lay the groundwork for comfort and energy efficiency.
Choosing the Right Insulation for Your Steel Home
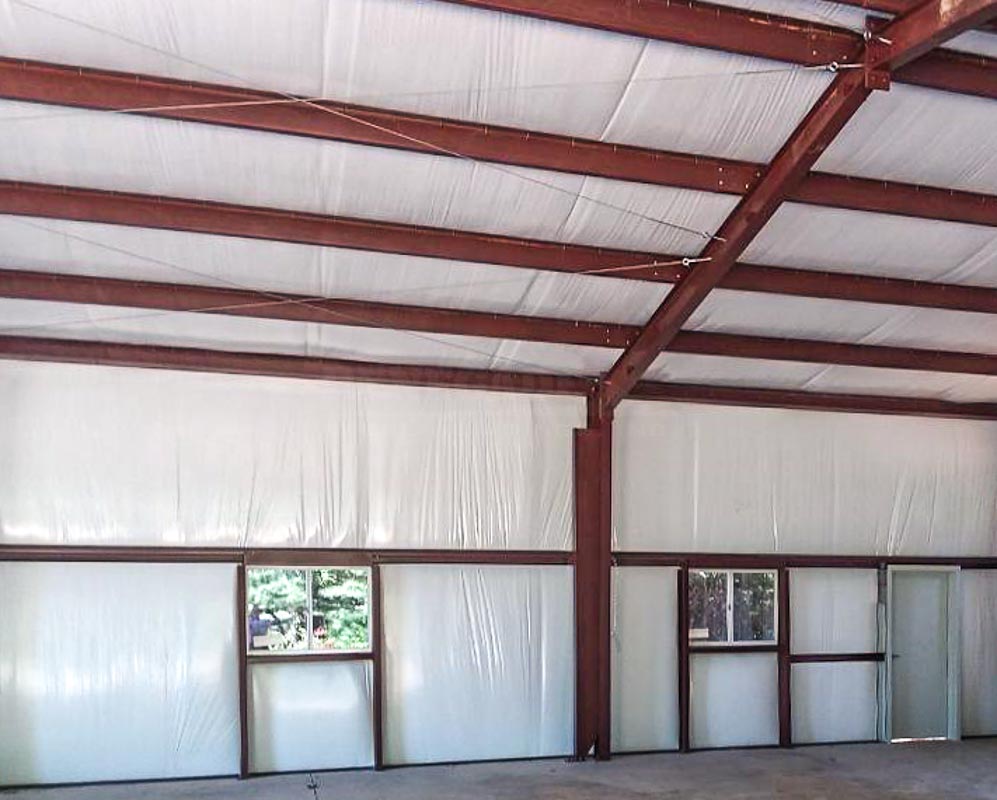
Metal is a fantastic conductor of heat. That’s great for a frying pan, but not so much for a house. Without the right insulation, your barndo will feel like an oven in summer and an icebox in winter. Even more important, you have to address inside and outside temperature differentials in order to mitigate condensation—the mortal enemy of any steel structure.
Your choices are Fiberglass blanket, Liner systems, spray foam or a hybrid approach using rigid board and traditional fiberglass batts.
-
Fiberglass blanket and Hi R-Value liner systems: This is the typical insulation used in many pre-engineered steel buildings creating anywhere from R13 up to R38 and beyond. With this method, the insulation is installed between the purlins and roof panels as well as between the girts and wall panels. Additional batt insulation can also be added to the interior framing to create a well insulated building.
-
Closed-Cell Spray Foam: This is widely considered the gold standard for barndominiums. A professional crew applies it directly to the interior of the steel panels, creating a seamless, airtight vapor barrier. It boasts a high R-value (around R-7 per inch) and even adds a bit of structural rigidity. The biggest hurdle? The cost—it’s easily the most expensive option upfront.
-
Rigid Foam Board & Batts: For a more budget-friendly route, you can glue rigid foam boards against the steel panels and meticulously seal every seam with tape. This creates your vapor barrier. After that, you frame your interior walls and fill the stud cavities with fiberglass batts to hit your target R-value.
Framing the Interior Walls
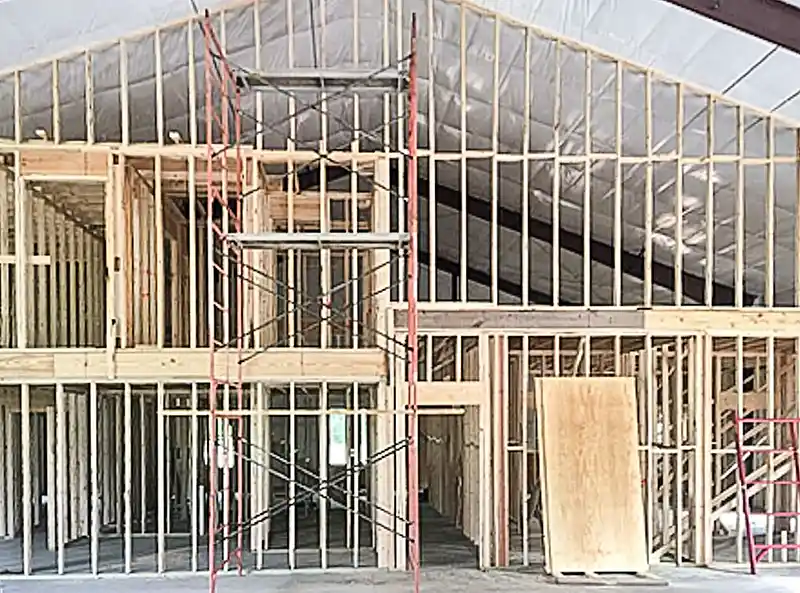

Once the insulation is handled, you can finally start defining your living spaces. It’s time to grab the chop saw and framing nailer to build the interior walls for bedrooms, bathrooms, and closets, following your floor plan to the letter. You can stick with traditional wood studs or opt for light-gauge steel studs.
Steel studs are a natural fit for a barndominium; they’re impervious to rot and termites, and they stay perfectly straight forever. Just remember that running electrical wiring through them requires plastic grommets in the pre-punched holes to protect the wire sheathing from sharp metal edges. Wood, on the other hand, is often faster and more familiar territory for many builders.
Running Your Mechanical, Electrical, and Plumbing Systems
After the walls are framed but still open, it’s time for the "MEP rough-in." This is when licensed electricians, plumbers, and HVAC technicians descend to run all the wires, pipes, and ductwork through the open stud bays. It’s a carefully coordinated dance to make sure everything fits without getting in another trade’s way.
For your HVAC system, remember that the open-concept layouts common in barndos benefit from a properly sized central unit. Well-planned ductwork is essential to ensure even heating and cooling. Given the large, open volumes, an undersized system will struggle to keep up, leaving you with hot and cold spots.
This stage is also where the cost-effectiveness of a barndominium really starts to shine. People are flocking to this style of home because construction costs can be lower than traditional homes. Pairing that with high-efficiency systems and insulation can slash future energy bills by half, adding to the long-term financial win. You can explore more about the cost advantages of these unique homes.
From Drywall to Final Finishes
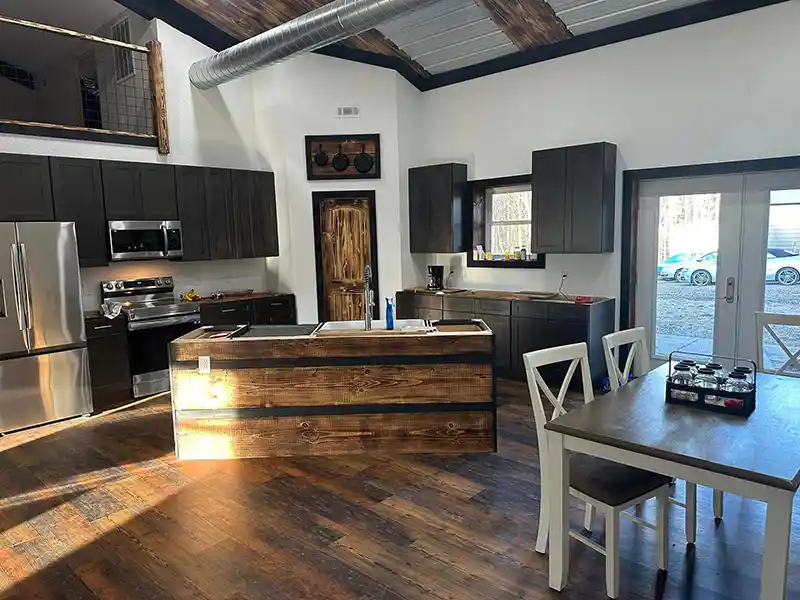
Once the MEP systems pass inspection, the transformation picks up speed. Drywall goes up, and suddenly those framed-out skeletons look like actual rooms. Next comes the methodical process of taping, mudding, and sanding to create smooth, paint-ready walls and ceilings.
From here on out, it’s all about the details that reflect your personal style:
-
Flooring: Polished and stained concrete is a hugely popular choice. It's durable, low-maintenance, and honors the building's industrial roots. Luxury vinyl plank (LVP) is another fantastic option, giving you a wood look with waterproof durability.
-
Cabinets & Countertops: Your kitchen and bathrooms take shape as cabinets are installed, followed by countertop templating and installation.
-
Paint & Trim: Nothing makes a space feel finished like a fresh coat of paint. Installing baseboards, door casings, and window trim adds that polished, completed look.
-
Final Fixtures: The last major step involves the electricians and plumbers returning to install light fixtures, outlets, switches, sinks, toilets, and faucets. This is often called the "trim-out" phase.
This interior finishing process is often the longest and most complex part of the build. It requires a ton of patience and a keen eye for detail, but this is where that industrial shell truly and finally becomes your home.
Common Questions About Building a Barndominium
Even with a solid plan, a few key questions always come up. We get it. Building a home is a huge undertaking, and you want to get the details right. This is where we tackle the common concerns we hear from builders just like you.
These are the practical, real-world questions that can make or break a project's budget and timeline. Let’s clear up the confusion so you can move forward with confidence.
How Does Barndominium Resale Value Compare to a Traditional Home?
This is the big one, isn't it? For a long time, people worried that a barndo wouldn't hold its value like a stick-built home. That concern is quickly becoming a thing of the past.
The explosion in barndominium popularity, especially in rural and suburban areas, has created a real market demand. Appraisers, lenders, and real estate agents are all getting familiar with these homes, which helps legitimize their value.
Several things work in your favor when it comes to resale:
-
High Demand: That unique look, the wide-open floor plans, and the sheer durability are exactly what many buyers are actively looking for.
-
Quality Finishes: A barndo finished out with high-end materials—think granite countertops, quality flooring, and modern fixtures—is going to appraise right alongside a custom stick-built home.
-
Land Value: Barndos are often built on acreage, and that land is a massive part of the property's total value.
The bottom line? A well-built, nicely finished barndominium in a good location can absolutely go toe-to-toe with traditional homes on the resale market. Don't skimp on the interior, and you'll protect your investment.
What Is a Realistic Timeline from Start to Finish?
Everyone loves that steel buildings go up fast, but it's crucial to know which part is fast. The steel frame itself can be erected in just a few weeks, which is amazing to watch. But that’s just one piece of the puzzle.
Realistically, you should plan for six to nine months from the day you break ground to the day you move in. If you're planning a highly complex or fully custom build, it's not unusual for it to stretch to a full year.
The most common scheduling mistake is assuming the entire build moves at the speed of the frame erection. The interior finishing—from insulation and drywall to painting and cabinet installation—is always the longest and most unpredictable phase of the project.
Here’s a rough breakdown of how that time gets spent:
-
Site Prep & Foundation: 3-6 weeks
-
Kit Delivery & Erection: 2-4 weeks
-
Interior Framing & MEP Rough-In: 4-8 weeks
-
Insulation, Drywall & Finishes: 12-20+ weeks
Weather, subcontractor schedules, and supply chain issues can all throw a wrench in the works. The smartest move is to build a detailed schedule with your general contractor and add a healthy buffer for the unexpected.
What Are the Biggest Mistakes First-Time Builders Make?
If you want to build a barndominium the right way, learn from the mistakes others have made. While every project has its own quirks, we see first-timers run into the same few problems over and over. Knowing them upfront can save you a world of headache and money.
The single biggest mistake is underestimating the total budget. It’s so easy to get excited about the price of the steel kit and forget everything else. The cost of site work, a septic system, running utilities, and all the interior finishes can easily double the cost of the building package. Always, always have a 10-15% contingency fund set aside for surprises.
Another huge error is skipping a soil report before you buy land. You need a geotechnical survey to be certain the ground can support your foundation. Finding out your soil is unstable after you’ve closed on the property can mean foundation costs that are thousands higher than you planned for.
Finally, a critical oversight is not planning for condensation. A steel building isn't like a wood-frame house; it needs a bulletproof insulation strategy. Just stuffing some fiberglass batts in the walls without dealing with thermal bridging and air leaks is asking for moisture problems, which leads to rust and mold.
Ready to design a barndominium that’s built to last? The team at Renegade Steel Buildings, Inc. can help you configure a high-quality, American-made steel building kit engineered for your exact location and vision. Start designing your dream home with our 3D tool or get a transparent, no-obligation quote today at https://renegadesteelbuildings.com/quick-quote/.